

最近在看Spring Security实战这本书,恰好官网也在
https://spring.io/blog/2022/02/21/spring-security-without-the-websecurityconfigureradapter
在新的版本中舍弃掉了webSecurityconfigureadaper,这里会参考书中旧的配置,编写新的Spring Security的新配置
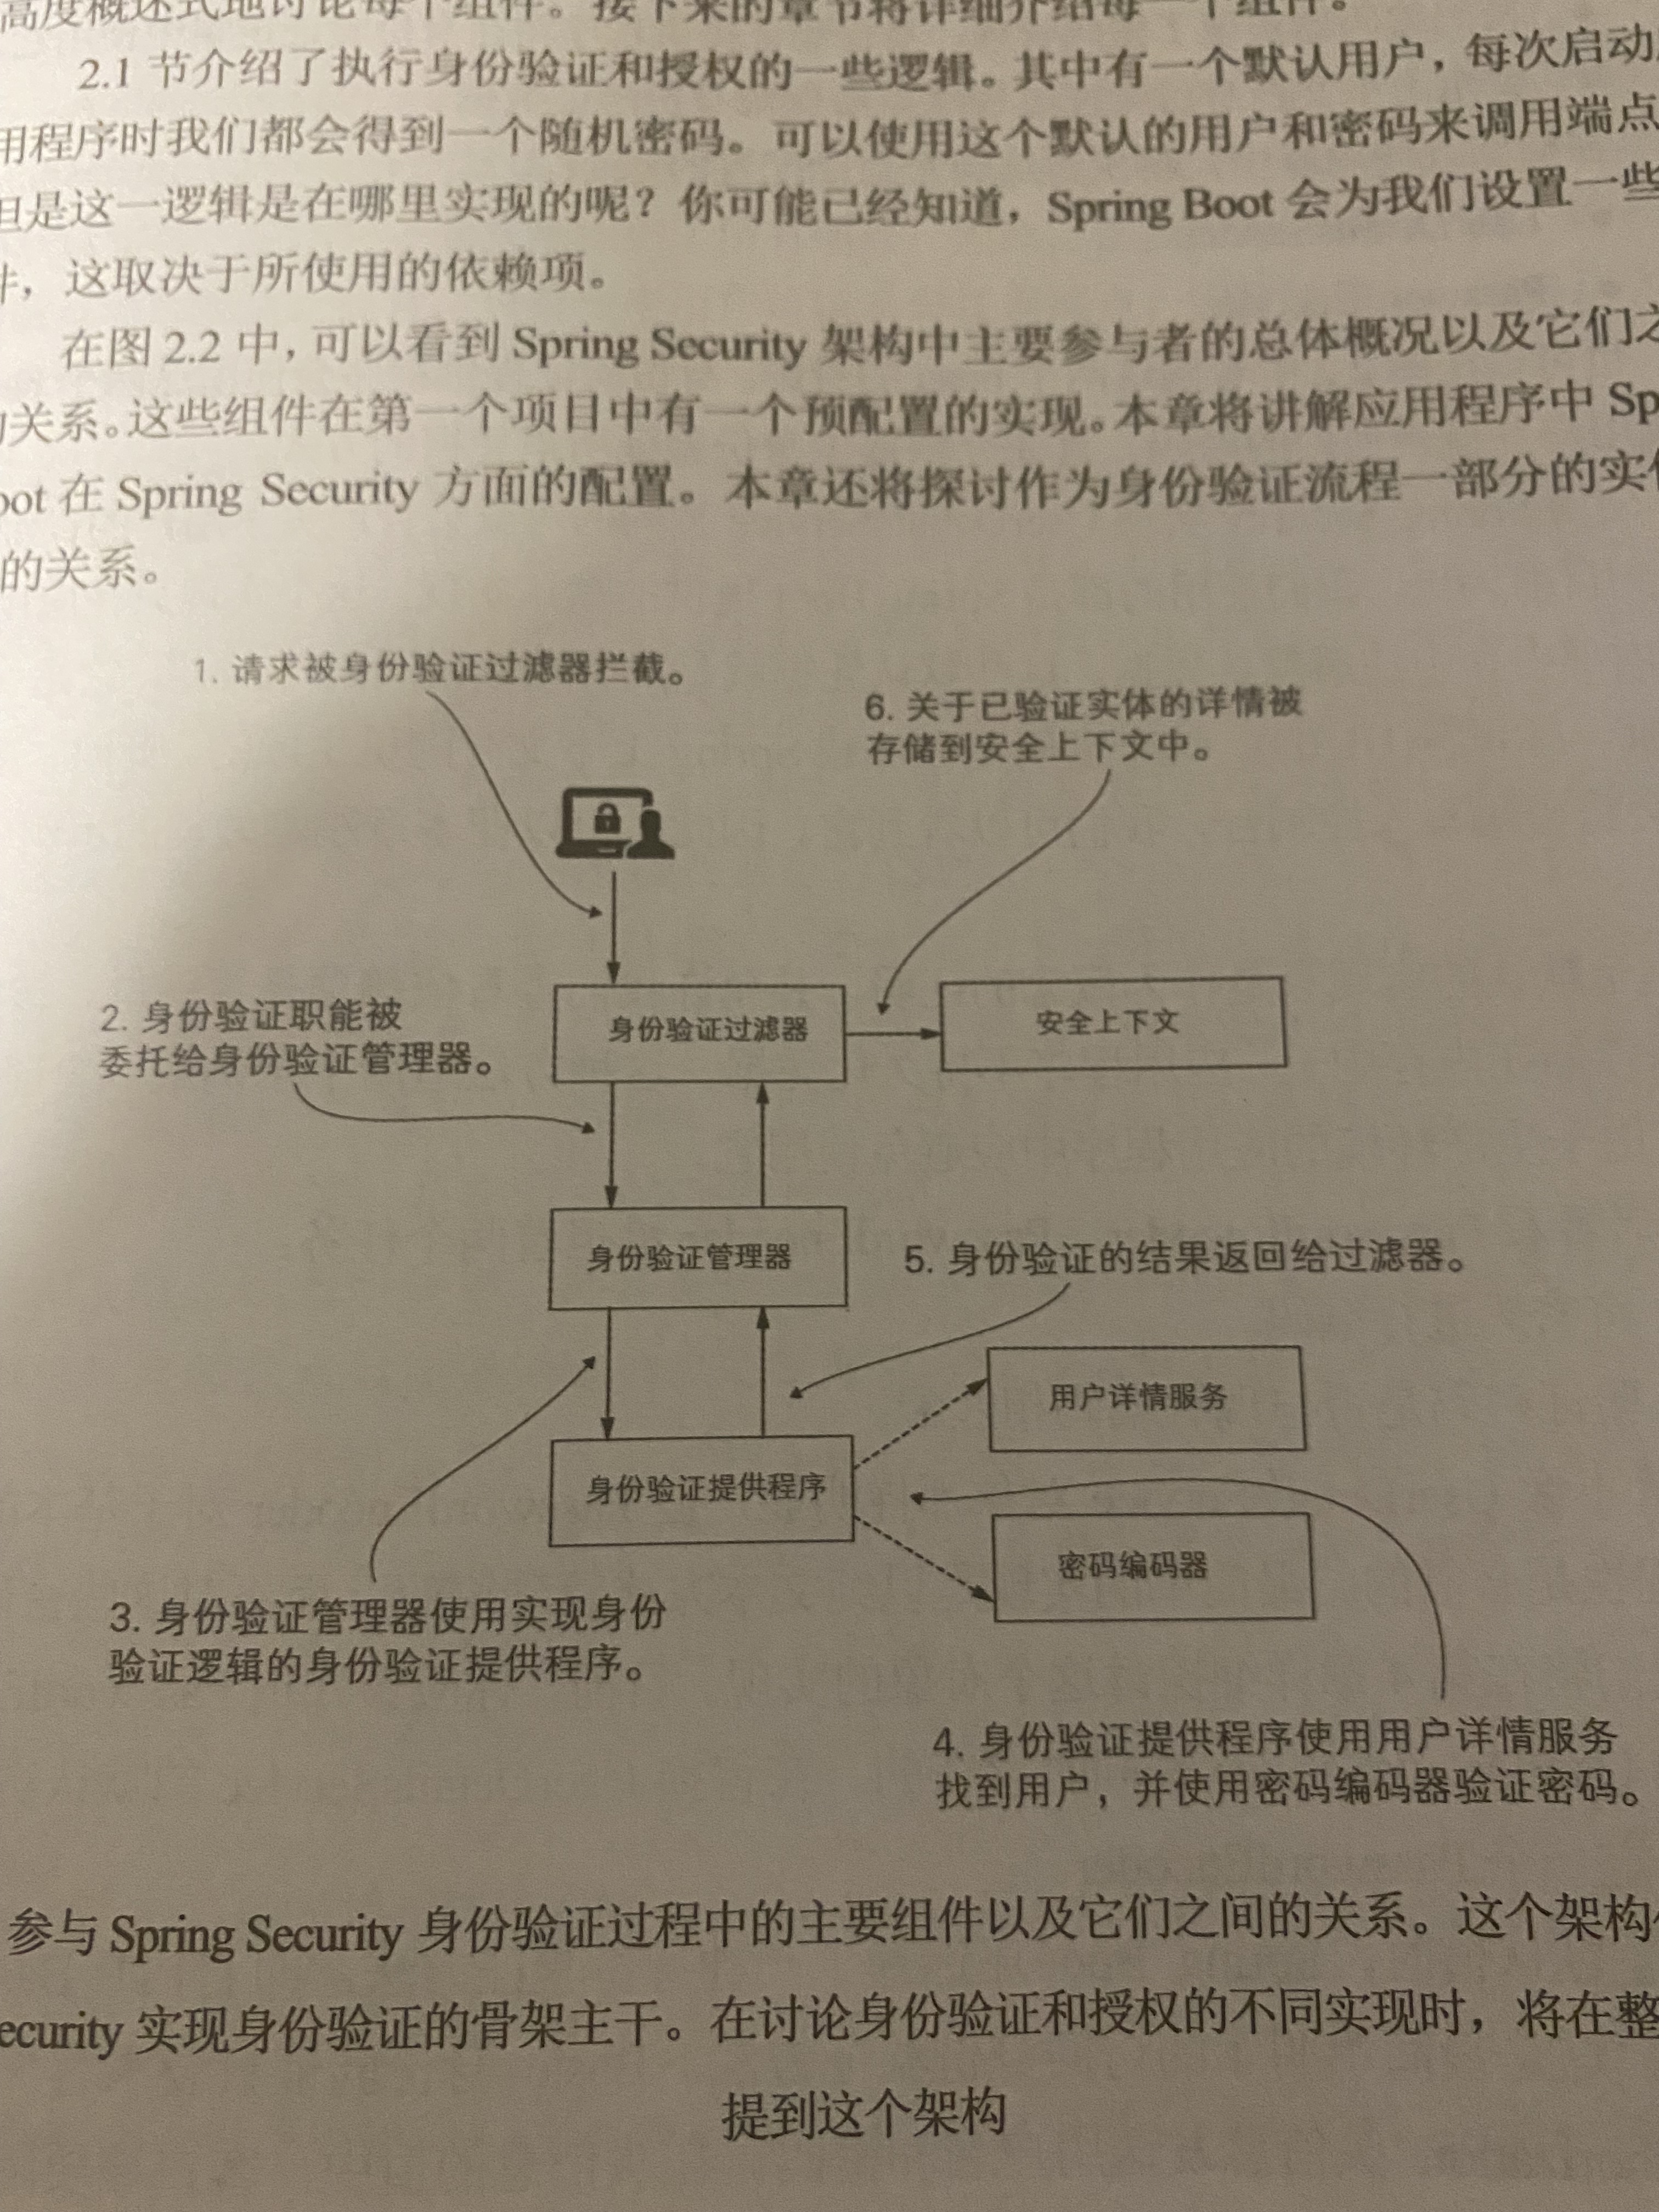
这里身份验证过滤器即为各种各样的Filter,可以在SpringBoot项目启动类通过容器查看DefaultSecurityFilterChain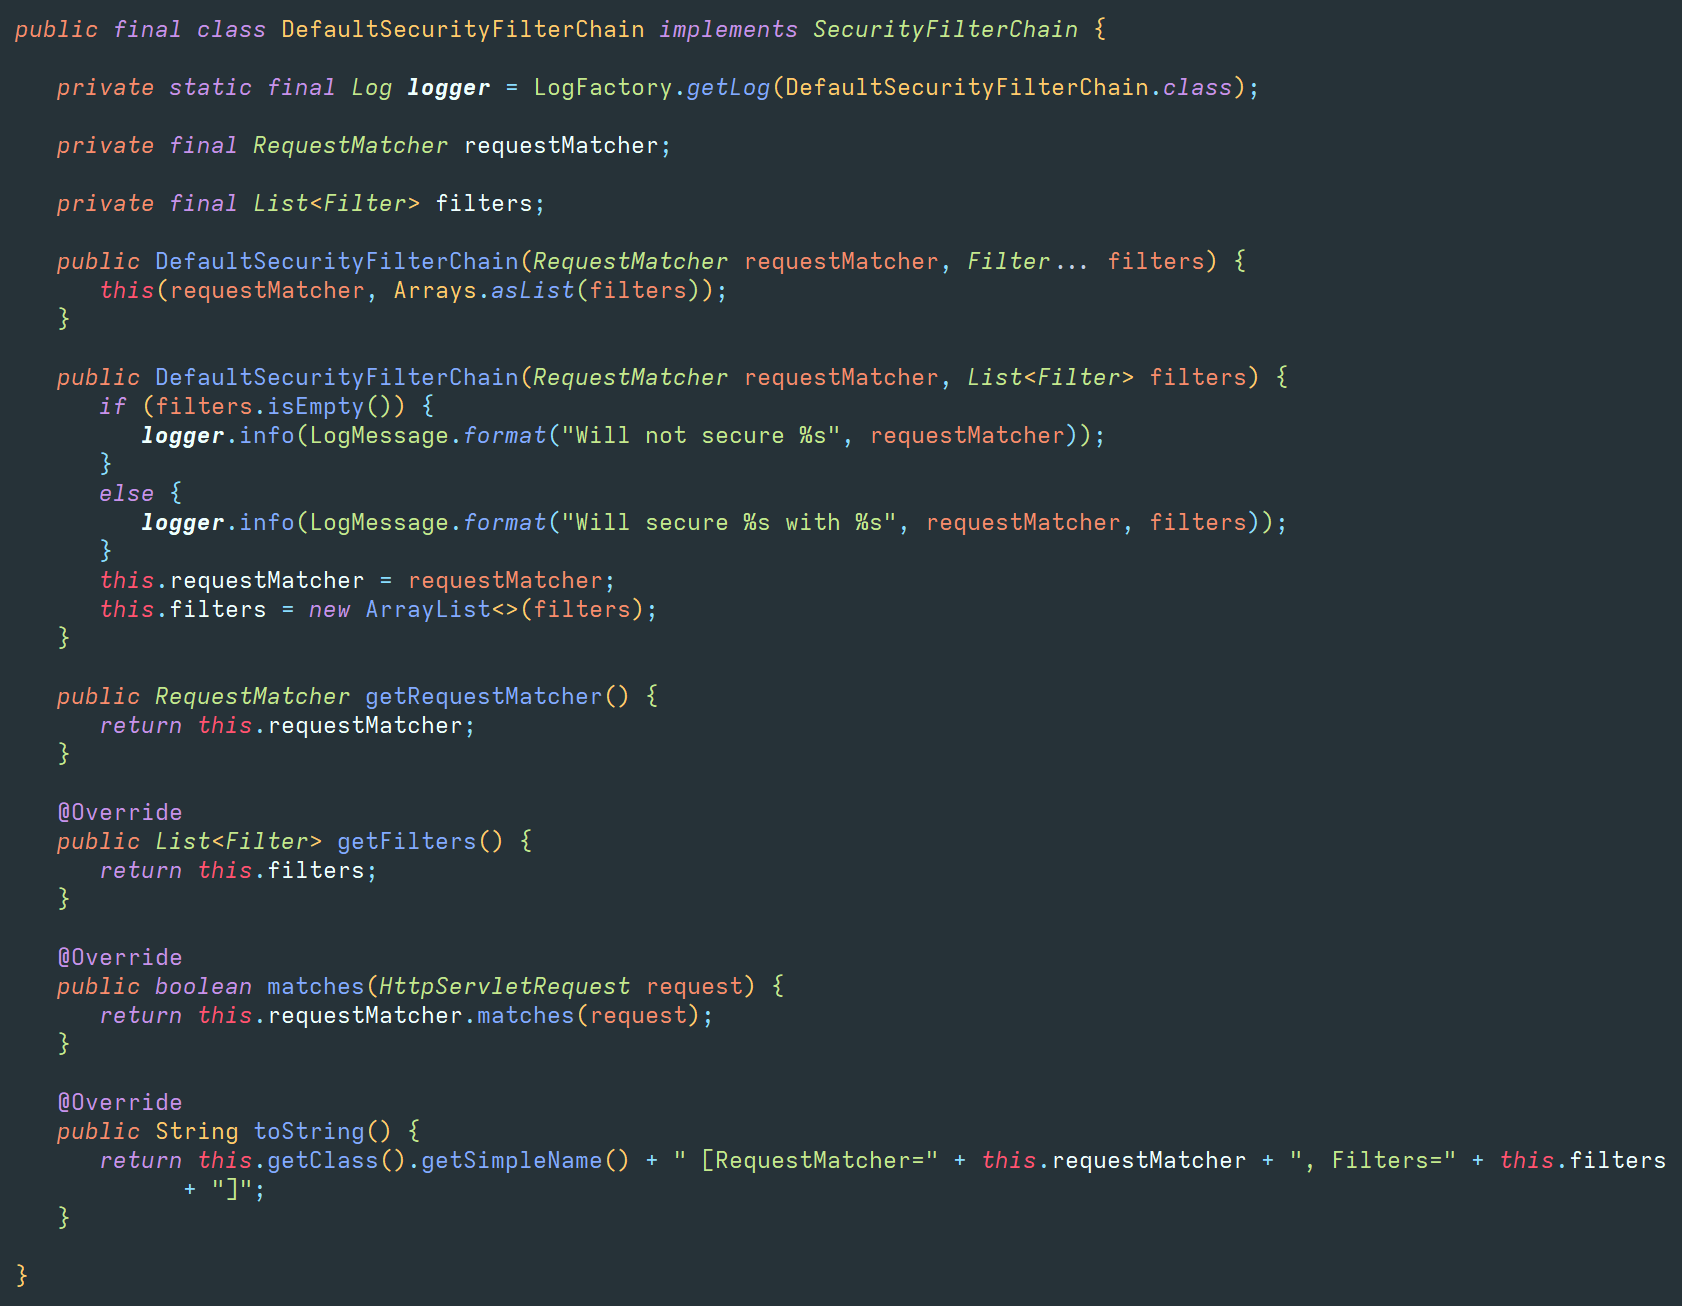 ,身份验证器即为
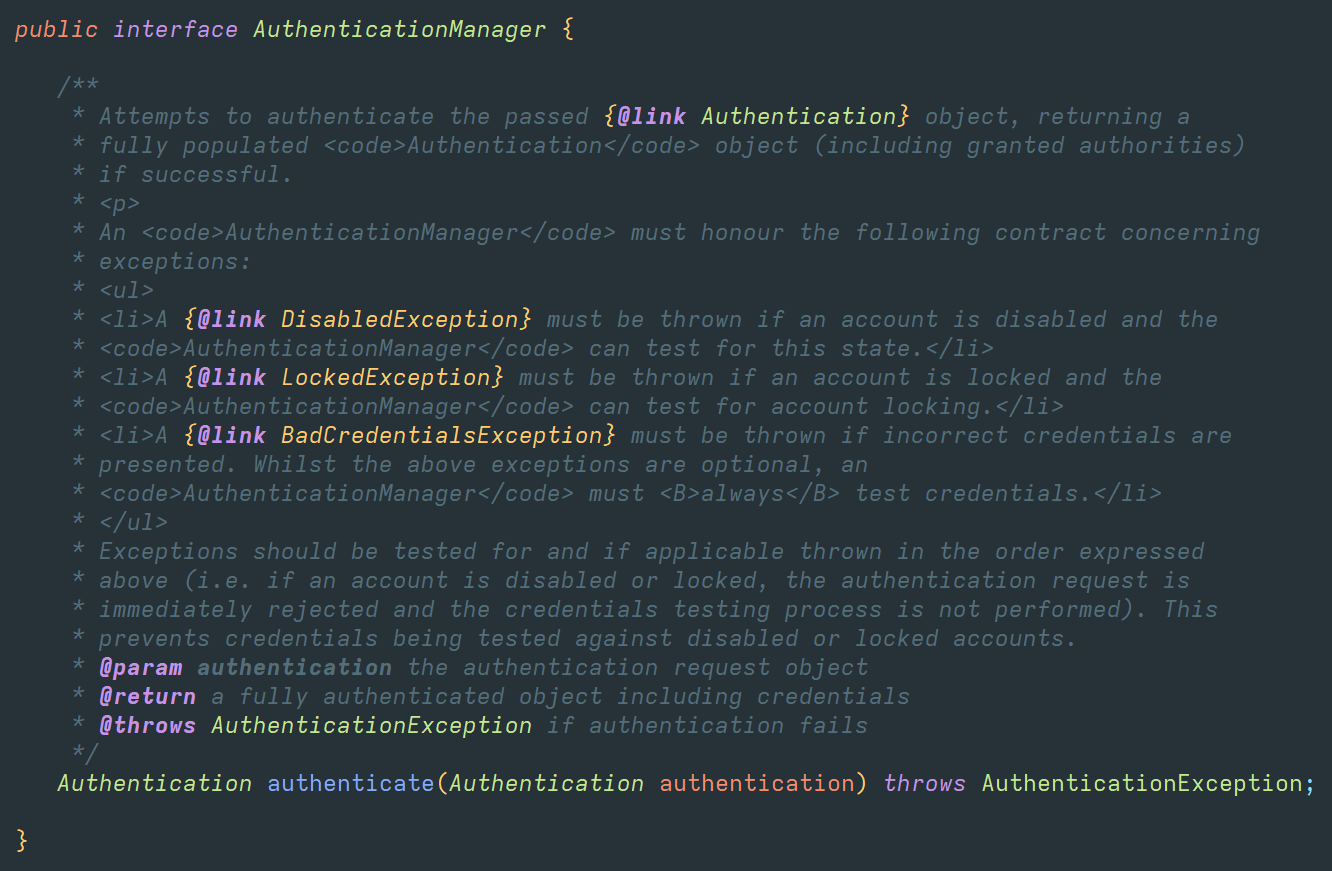 AuthenticationManager,身份验证提供程序则为
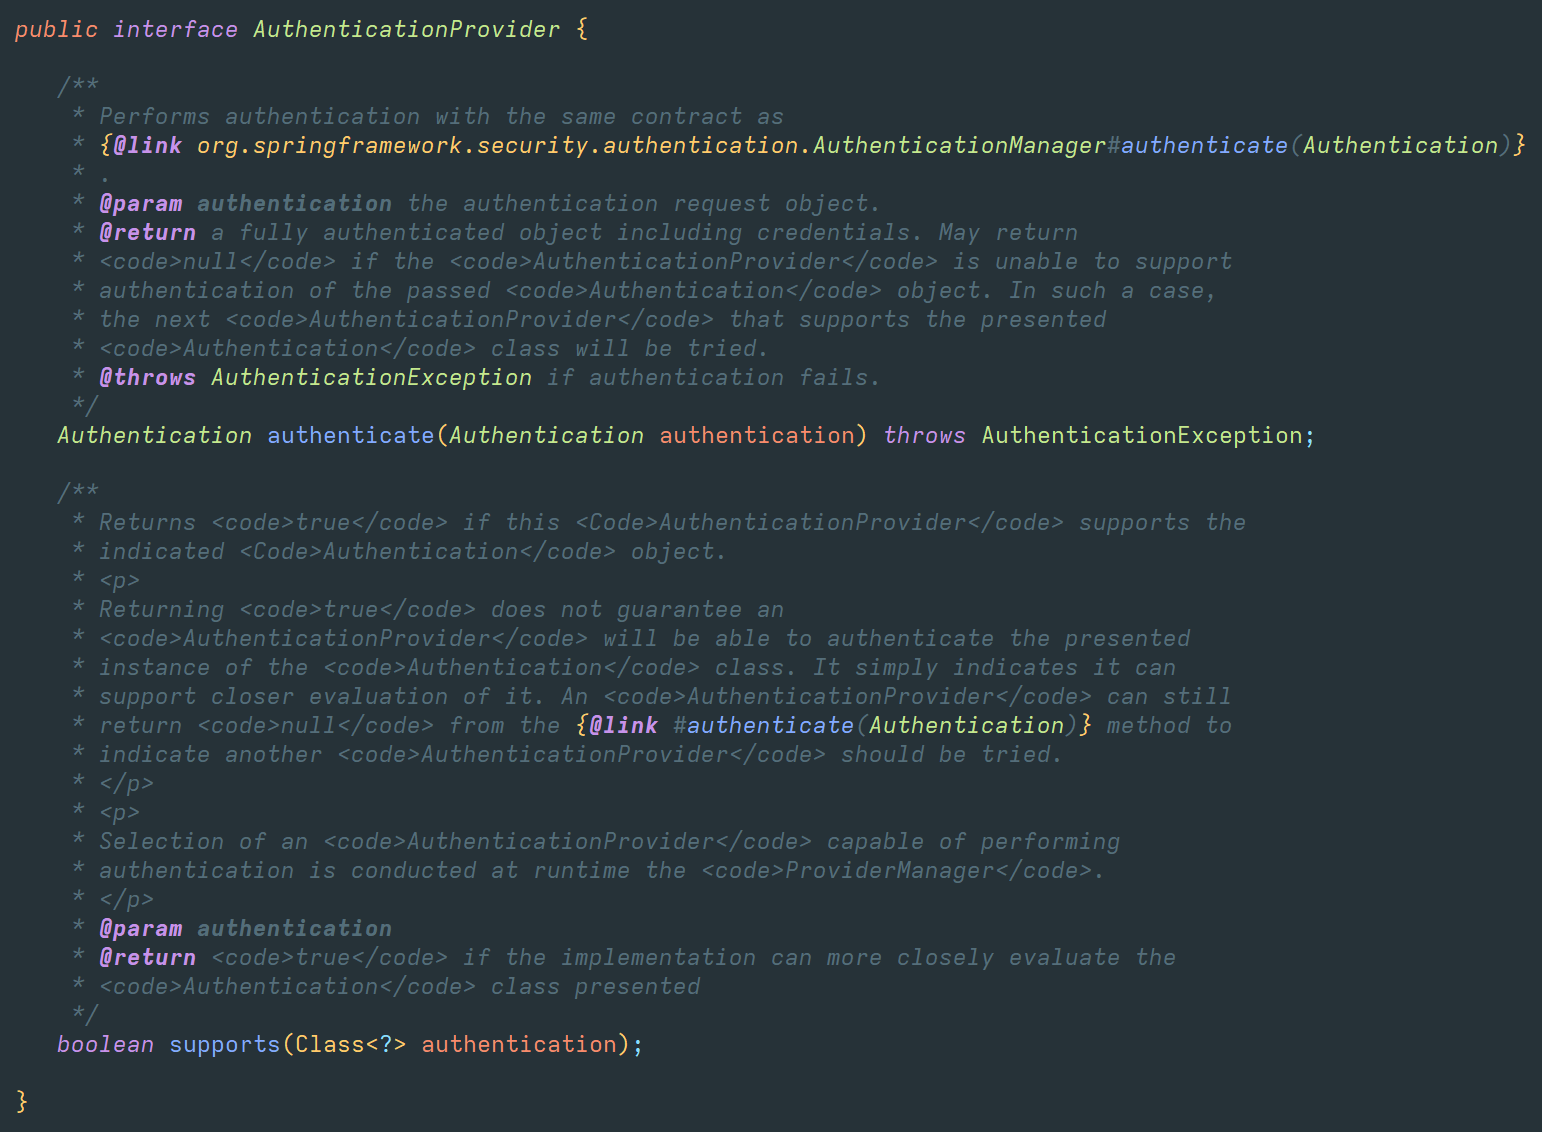 ,用户详情服务为
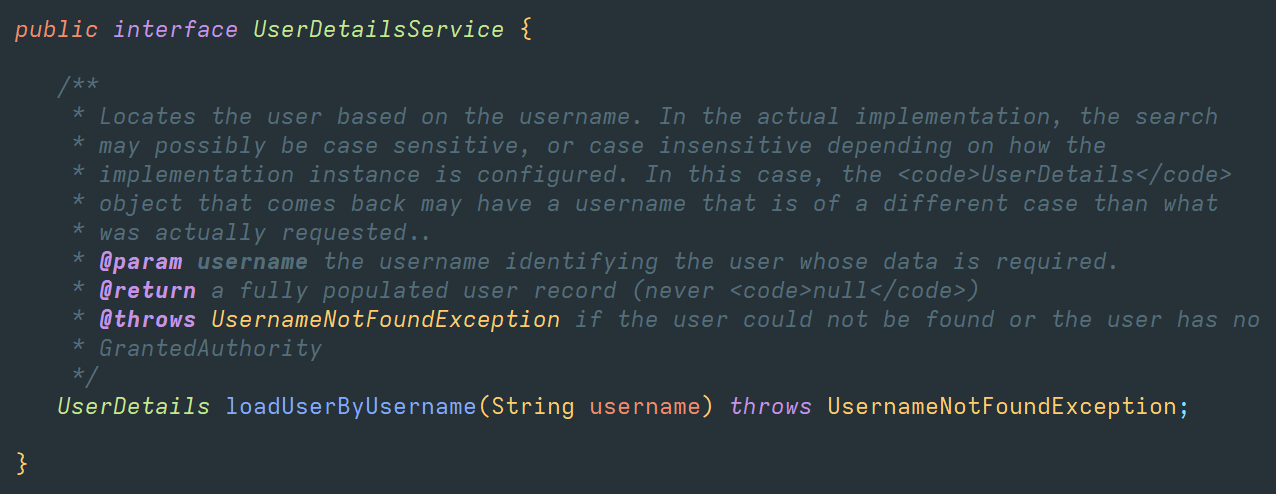 密码编码器为
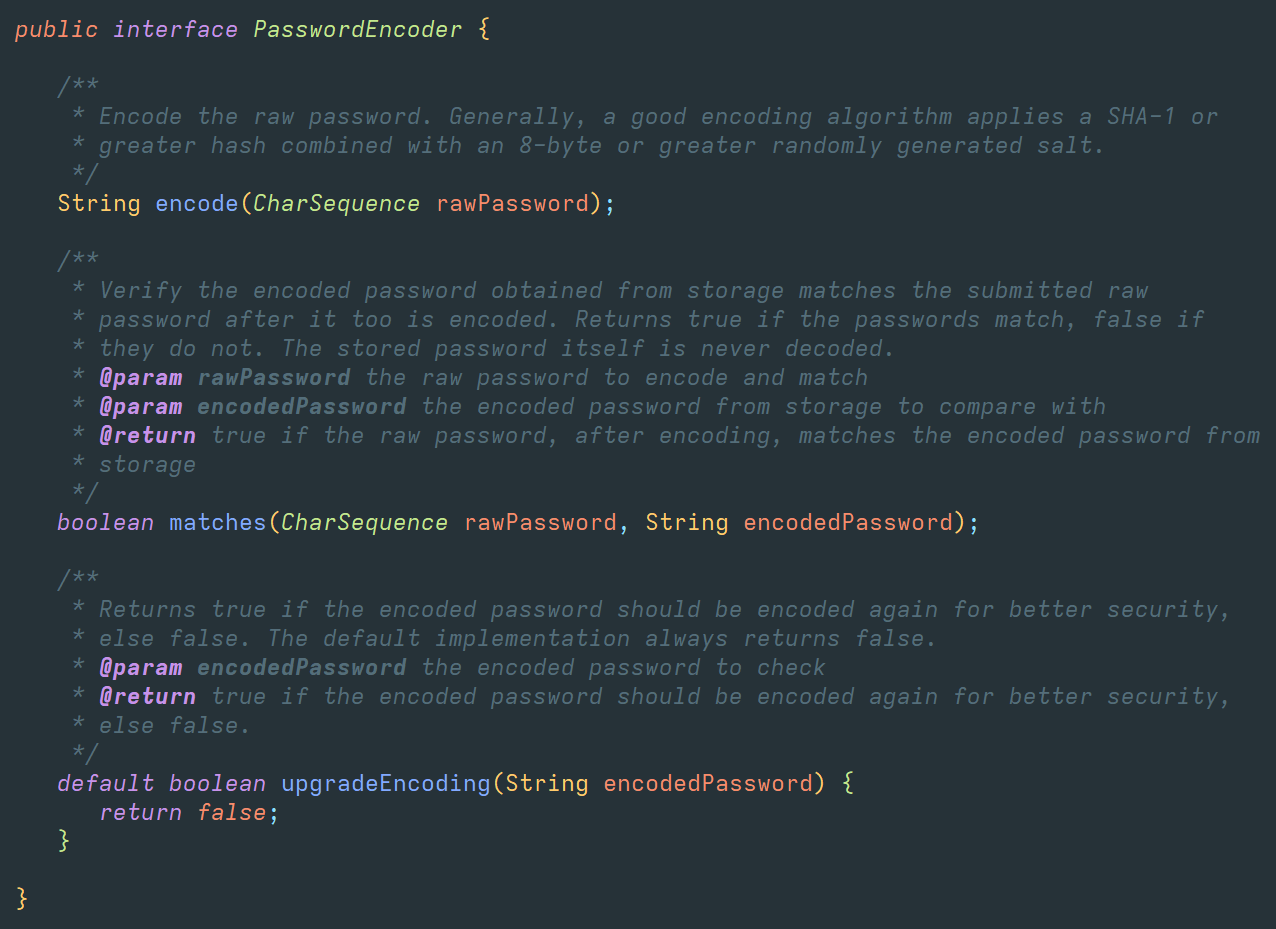 ,这是认证最重要的几个类或接口
我们现在正在配置的就是用户详情服务和密码编码器
使用@Bean的方式配置UserDetailsService和PasswordEncoder
@Configuration
public class ProjectConfig {
  /** 使用@Bean注入的方式配置Spring Security */
  @Bean
  public UserDetailsService userDetailsService() {
    var userDetailsService = new InMemoryUserDetailsManager();

    var user = User.withUsername("John").password("12345").authorities("read").build();
    userDetailsService.createUser(user);
    return userDetailsService;
  }

  @Bean
  public PasswordEncoder passwordEncoder() {
    return NoOpPasswordEncoder.getInstance();
  }


    @Bean
    public SecurityFilterChain filterChain(HttpSecurity http) throws Exception {
      http.httpBasic();
//     http.authorizeHttpRequests().anyRequest().authenticated();
      http.authorizeHttpRequests().anyRequest().permitAll();

      return http.build();
    }
解释一下上述的代码,我们通过@Bean的方式向Spring的上下文中注入了两个Bean一个是基于内存的用户服务管理器,并建立了一个用户(John,密码12345,权限read),另一个是一个密码编码器,在目前的版本这个是已经被弃用的,这里为了登录方便所以依旧使用这个
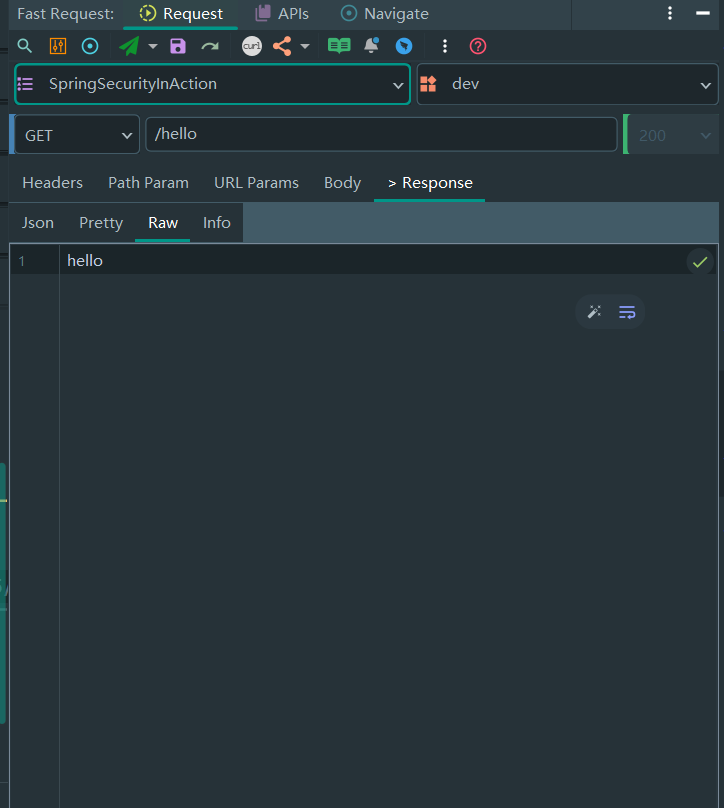
这里测试下我们写的HelloWorldController,使用Basic Auth
这里使用的新的配置,像组件一样将SecurityFilterChain放入Spring的上下文中
这里注释了任何端点都需要授权的配置,配置了所有端点都可以访问的配置,这里也要提醒这里也使用到了新的拓展端点配置http.authorizeHttpRequests()用法与旧的 http.authorizeRequests()类似,但也有一点点不同,一般用法出错时,日志会提醒你如何修正错误
另一种配置
  /**
   * 因为这里是基于内存的所以参考官网AuthenticationManagerBuilder
   * https://spring.io/blog/2022/02/21/spring-security-without-the-websecurityconfigureradapter
   * 既可以注入Bean 也可以在http处配置
   *
   * @return
   */
  @Bean
  public UserDetailsService userDetailsService() {
    UserDetails user = User.withUsername("John").password("12345").roles("read").build();
    var userDetailsService = new InMemoryUserDetailsManager();
    userDetailsService.createUser(user);
    return userDetailsService;
  }

  @Bean
  public SecurityFilterChain filterChain(HttpSecurity http) throws Exception {
    http.httpBasic();
    http.authorizeHttpRequests().anyRequest().authenticated();
    //    http.authorizeHttpRequests().anyRequest().permitAll();
    //    http.userDetailsService(userDetailsService());

    return http.build();
  }
  @Bean
  public PasswordEncoder passwordEncoder() {
    return NoOpPasswordEncoder.getInstance();
  }
这里则使用些微不同的方式配置了UserDetailService,然后将UserDetailService配置到了
filterChain中,但这样看起了二者混合到一起,可能会引起混淆
配置身份验证提供程序AuthenticationProvider
上面我们配置的是用户详情服务和密码编码器,接下来的我们对着图中的AuthenticationProvider进行自定义配置
合理的进行配置可以使我们不在需要UserDetailService和PasswordEncoder来配置默认的
AuthenticationProvider
我们这里继承AuthenticationProvider接口
@Component
public class CustomAuthenticationProvider implements AuthenticationProvider {

  @Override
  public Authentication authenticate(Authentication authentication) throws AuthenticationException {
    String username = authentication.getName();
    String password = authentication.getCredentials().toString();
    if (Objects.equals(username, "john") && Objects.equals(password, "12345")) {
      return new UsernamePasswordAuthenticationToken(username, password, Collections.emptyList());
    } else {
      throw new AuthenticationCredentialsNotFoundException("用户名或密码错误");
    }
  }

  @Override
  public boolean supports(Class<?> authentication) {
    return UsernamePasswordAuthenticationToken.class.isAssignableFrom(authentication);
  }
}
通过if else进行用户名和密码的匹配
然后将该类注入到Spring Security中生效
@Configuration
public class ProjectConfig {
  @Autowired private CustomAuthenticationProvider customAuthenticationProvider;

  @Bean
  public SecurityFilterChain filterChain(HttpSecurity http) throws Exception {
    http.httpBasic();
    http.authorizeHttpRequests().anyRequest().authenticated();
    http.authenticationProvider(customAuthenticationProvider);
    return http.build();
  }
}
这在官网中被称为spring security段本地认证服务器
使用这种配置后将不在需要PasswordEncoder 和 UserDetailsService
Q.E.D.